From Queenpedia.com
| Line 7: | Line 7: | ||
{| | {| | ||
|valign="top"|[[Image:iwiacd.jpg|150px]] | |valign="top"|[[Image:iwiacd.jpg|150px]] | ||
| - | |valign="top" style="width: | + | |valign="top" style="width:180px;"|[[Image:iwiacdback.jpg|150px]] |
|valign="top" style="width:250px;"|'''[[I Want It All (single) | I Want It All]] | |valign="top" style="width:250px;"|'''[[I Want It All (single) | I Want It All]] | ||
| Line 28: | Line 28: | ||
{| | {| | ||
|valign="top"|[[Image:breakthrucd.jpg|150px]] | |valign="top"|[[Image:breakthrucd.jpg|150px]] | ||
| - | |valign="top" style="width: | + | |valign="top" style="width:180px;"|[[Image:breakthrucdback.jpg|150px]] |
|valign="top" style="width:250px;"|'''[[Breakthru (single) | Breakthru]] | |valign="top" style="width:250px;"|'''[[Breakthru (single) | Breakthru]] | ||
| Line 49: | Line 49: | ||
{| | {| | ||
|valign="top"|[[Image:invisiblecd.jpg|150px]] | |valign="top"|[[Image:invisiblecd.jpg|150px]] | ||
| - | |valign="top" style="width: | + | |valign="top" style="width:180px;"|[[Image:invisiblecdback.jpg|150px]] |
|valign="top" style="width:250px;"|'''[[The Invisible Man (single) | The Invisible Man]] | |valign="top" style="width:250px;"|'''[[The Invisible Man (single) | The Invisible Man]] | ||
| Line 70: | Line 70: | ||
{| | {| | ||
|valign="top"|[[Image:scandalcd.jpg|150px]] | |valign="top"|[[Image:scandalcd.jpg|150px]] | ||
| - | |valign="top" style="width: | + | |valign="top" style="width:180px;"| |
|valign="top" style="width:250px;"|'''[[Scandal (single) | Scandal]] | |valign="top" style="width:250px;"|'''[[Scandal (single) | Scandal]] | ||
| Line 91: | Line 91: | ||
{| | {| | ||
|valign="top"|[[Image:miraclecd.jpg|150px]] | |valign="top"|[[Image:miraclecd.jpg|150px]] | ||
| - | |valign="top" style="width: | + | |valign="top" style="width:180px;"| |
|valign="top" style="width:250px;"|'''[[The Miracle (single) | The Miracle]] | |valign="top" style="width:250px;"|'''[[The Miracle (single) | The Miracle]] | ||
| Line 112: | Line 112: | ||
{| | {| | ||
|valign="top"|[[Image:innuendocd.jpg|150px]] | |valign="top"|[[Image:innuendocd.jpg|150px]] | ||
| - | |valign="top" style="width: | + | |valign="top" style="width:180px;"|[[Image:innuendocdback.jpg|150px]] |
|valign="top" style="width:250px;"|'''[[Innuendo (single) | Innuendo]] | |valign="top" style="width:250px;"|'''[[Innuendo (single) | Innuendo]] | ||
| Line 133: | Line 133: | ||
{| | {| | ||
|valign="top"|[[Image:igsmcd.jpg|150px]] | |valign="top"|[[Image:igsmcd.jpg|150px]] | ||
| - | |valign="top" style="width: | + | |valign="top" style="width:180px;"|[[Image:igsmcdback.jpg|150px]] |
|valign="top" style="width:250px;"|'''[[I'm Going Slightly Mad (single) | I'm Going Slightly Mad]] | |valign="top" style="width:250px;"|'''[[I'm Going Slightly Mad (single) | I'm Going Slightly Mad]] | ||
| Line 154: | Line 154: | ||
{| | {| | ||
|valign="top"|[[Image:headlongcd.jpg|150px]] | |valign="top"|[[Image:headlongcd.jpg|150px]] | ||
| - | |valign="top" style="width: | + | |valign="top" style="width:180px;"|[[Image:headlongcdback.jpg|150px]] |
|valign="top" style="width:250px;"|'''[[Headlong (single) | Headlong]] | |valign="top" style="width:250px;"|'''[[Headlong (single) | Headlong]] | ||
| Line 175: | Line 175: | ||
{| | {| | ||
|valign="top"|[[Image:tsmgo1cd.jpg|150px]] | |valign="top"|[[Image:tsmgo1cd.jpg|150px]] | ||
| - | |valign="top" style="width: | + | |valign="top" style="width:180px;"|[[Image:tsmgo1cdback.jpg|150px]] |
|valign="top" style="width:250px;"|'''[[The Show Must Go On (single) | The Show Must Go On (CD 1)]] | |valign="top" style="width:250px;"|'''[[The Show Must Go On (single) | The Show Must Go On (CD 1)]] | ||
| Line 198: | Line 198: | ||
{| | {| | ||
|valign="top"|[[Image:tsmgo2cd.jpg|150px]] | |valign="top"|[[Image:tsmgo2cd.jpg|150px]] | ||
| - | |valign="top" style="width: | + | |valign="top" style="width:180px;"| |
|valign="top" style="width:250px;"|'''[[The Show Must Go On (single) | The Show Must Go On (CD 2)]] | |valign="top" style="width:250px;"|'''[[The Show Must Go On (single) | The Show Must Go On (CD 2)]] | ||
| Line 221: | Line 221: | ||
{| | {| | ||
|valign="top"|[[Image:borhapcd.jpg|150px]] | |valign="top"|[[Image:borhapcd.jpg|150px]] | ||
| - | |valign="top" style="width: | + | |valign="top" style="width:180px;"|[[Image:borhapcdback.jpg|150px]] |
|valign="top" style="width:250px;"|'''[[Bohemian Rhapsody (single) | Bohemian Rhapsody]] | |valign="top" style="width:250px;"|'''[[Bohemian Rhapsody (single) | Bohemian Rhapsody]] | ||
| Line 240: | Line 240: | ||
{| | {| | ||
|valign="top"|[[Image:fivelivecd.jpg|150px]] | |valign="top"|[[Image:fivelivecd.jpg|150px]] | ||
| - | |valign="top" style="width: | + | |valign="top" style="width:180px;"|[[Image:fivelivecdback.jpg|150px]] |
|valign="top" style="width:250px;"|'''[[Five Live EP]] | |valign="top" style="width:250px;"|'''[[Five Live EP]] | ||
| Line 265: | Line 265: | ||
{| | {| | ||
|valign="top"|[[Image:heavenpt1cd.jpg|150px]] | |valign="top"|[[Image:heavenpt1cd.jpg|150px]] | ||
| - | |valign="top" style="width: | + | |valign="top" style="width:180px;"|[[Image:heavenpt1cdback.jpg|150px]] |
|valign="top" style="width:250px;"|'''[[Heaven For Everyone (Queen single) | Heaven For Everyone]] Part 1 of 2 | |valign="top" style="width:250px;"|'''[[Heaven For Everyone (Queen single) | Heaven For Everyone]] Part 1 of 2 | ||
| Line 286: | Line 286: | ||
{| | {| | ||
|valign="top"|[[Image:heavenpt2cd.jpg|150px]] | |valign="top"|[[Image:heavenpt2cd.jpg|150px]] | ||
| - | |valign="top" style="width: | + | |valign="top" style="width:180px;"|[[Image:heavenpt2cdback.jpg|150px]] |
|valign="top" style="width:250px;"|'''[[Heaven For Everyone (Queen single) | Heaven For Everyone]] Part 2 of 2 | |valign="top" style="width:250px;"|'''[[Heaven For Everyone (Queen single) | Heaven For Everyone]] Part 2 of 2 | ||
| Line 310: | Line 310: | ||
{| | {| | ||
|valign="top"|[[Image:winterpt1cd.jpg|150px]] | |valign="top"|[[Image:winterpt1cd.jpg|150px]] | ||
| - | |valign="top" style="width: | + | |valign="top" style="width:180px;"|[[Image:winterpt1cdback.jpg|150px]] |
|valign="top" style="width:250px;"|'''[[A Winter's Tale (single) | A Winter's Tale]] Part 1 of 2 | |valign="top" style="width:250px;"|'''[[A Winter's Tale (single) | A Winter's Tale]] Part 1 of 2 | ||
| Line 334: | Line 334: | ||
{| | {| | ||
|valign="top"|[[Image:winterpt2cd.jpg|150px]] | |valign="top"|[[Image:winterpt2cd.jpg|150px]] | ||
| - | |valign="top" style="width: | + | |valign="top" style="width:180px;"| |
|valign="top" style="width:250px;"|'''[[A Winter's Tale (single) | A Winter's Tale]] Part 2 of 2 | |valign="top" style="width:250px;"|'''[[A Winter's Tale (single) | A Winter's Tale]] Part 2 of 2 | ||
| Line 356: | Line 356: | ||
{| | {| | ||
|valign="top"|[[Image:tmlwkyukcd.jpg|150px]] | |valign="top"|[[Image:tmlwkyukcd.jpg|150px]] | ||
| - | |valign="top" style="width: | + | |valign="top" style="width:180px;"|[[Image:tmlwkyukcdback.jpg|150px]] |
|valign="top" style="width:250px;"|'''[[Too Much Love Will Kill You (Queen single) | Too Much Love Will Kill You]] | |valign="top" style="width:250px;"|'''[[Too Much Love Will Kill You (Queen single) | Too Much Love Will Kill You]] | ||
| Line 380: | Line 380: | ||
{| | {| | ||
|valign="top"|[[Image:lmlukcd1.jpg|150px]] | |valign="top"|[[Image:lmlukcd1.jpg|150px]] | ||
| - | |valign="top" style="width: | + | |valign="top" style="width:180px;"|[[Image:lmlukcd1back.jpg|150px]] |
|valign="top" style="width:250px;"|'''[[Let Me Live (single) | Let Me Live]] Part 1 of 2 | |valign="top" style="width:250px;"|'''[[Let Me Live (single) | Let Me Live]] Part 1 of 2 | ||
| Line 404: | Line 404: | ||
{| | {| | ||
|valign="top"|[[Image:lmlukcd2.jpg|150px]] | |valign="top"|[[Image:lmlukcd2.jpg|150px]] | ||
| - | |valign="top" style="width: | + | |valign="top" style="width:180px;"|[[Image:lmlukcd2back.jpg|150px]] |
|valign="top" style="width:250px;"|'''[[Let Me Live (single) | Let Me Live]] Part 2 of 2 | |valign="top" style="width:250px;"|'''[[Let Me Live (single) | Let Me Live]] Part 2 of 2 | ||
| Line 428: | Line 428: | ||
{| | {| | ||
|valign="top"|[[Image:ydfmukcd.jpg|150px]] | |valign="top"|[[Image:ydfmukcd.jpg|150px]] | ||
| - | |valign="top" style="width: | + | |valign="top" style="width:180px;"| |
|valign="top" style="width:250px;"|'''[[You Don't Fool Me (single) | You Don't Fool Me]] | |valign="top" style="width:250px;"|'''[[You Don't Fool Me (single) | You Don't Fool Me]] | ||
| Line 452: | Line 452: | ||
{| | {| | ||
|valign="top"|[[Image:nobyukcd.jpg|150px]] | |valign="top"|[[Image:nobyukcd.jpg|150px]] | ||
| - | |valign="top" style="width: | + | |valign="top" style="width:180px;"|[[Image:nobyukcdback.jpg|150px]] |
|valign="top" style="width:250px;"|'''[[No-One But You (Only The Good Die Young) (single) | No-One But You (Only The Good Die Young)]] | |valign="top" style="width:250px;"|'''[[No-One But You (Only The Good Die Young) (single) | No-One But You (Only The Good Die Young)]] | ||
| Line 476: | Line 476: | ||
{| | {| | ||
|valign="top"|[[Image:upukcd1.jpg|150px]] | |valign="top"|[[Image:upukcd1.jpg|150px]] | ||
| - | |valign="top" style="width: | + | |valign="top" style="width:180px;"|[[Image:upukcd1back.jpg|150px]] |
|valign="top" style="width:250px;"|'''[[Under Pressure (rah mix) (single) | Under Pressure]] Part 1 of 2 | |valign="top" style="width:250px;"|'''[[Under Pressure (rah mix) (single) | Under Pressure]] Part 1 of 2 | ||
| Line 500: | Line 500: | ||
{| | {| | ||
|valign="top"|[[Image:upukcd2.jpg|150px]] | |valign="top"|[[Image:upukcd2.jpg|150px]] | ||
| - | |valign="top" style="width: | + | |valign="top" style="width:180px;"|[[Image:upukcd2back.jpg|150px]] |
|valign="top" style="width:250px;"|'''[[Under Pressure (rah mix) (single) | Under Pressure]] Part 2 of 2 | |valign="top" style="width:250px;"|'''[[Under Pressure (rah mix) (single) | Under Pressure]] Part 2 of 2 | ||
| Line 526: | Line 526: | ||
{| | {| | ||
|valign="top"|[[Image:seven3.jpg|150px]] | |valign="top"|[[Image:seven3.jpg|150px]] | ||
| - | |valign="top" style="width: | + | |valign="top" style="width:180px;"| |
|valign="top" style="width:250px;"|'''[[Seven Seas Of Rhye (single) | Seven Seas Of Rhye]] | |valign="top" style="width:250px;"|'''[[Seven Seas Of Rhye (single) | Seven Seas Of Rhye]] | ||
| Line 547: | Line 547: | ||
{| | {| | ||
|valign="top"|[[Image:killer3.jpg|150px]] | |valign="top"|[[Image:killer3.jpg|150px]] | ||
| - | |valign="top" style="width: | + | |valign="top" style="width:180px;"| |
|valign="top" style="width:250px;"|'''[[Killer Queen (single) | Killer Queen]] | |valign="top" style="width:250px;"|'''[[Killer Queen (single) | Killer Queen]] | ||
| Line 568: | Line 568: | ||
{| | {| | ||
|valign="top"|[[Image:borap3.jpg|150px]] | |valign="top"|[[Image:borap3.jpg|150px]] | ||
| - | |valign="top" style="width: | + | |valign="top" style="width:180px;"| |
|valign="top" style="width:250px;"|'''[[Bohemian Rhapsody (single) | Bohemian Rhapsody]] | |valign="top" style="width:250px;"|'''[[Bohemian Rhapsody (single) | Bohemian Rhapsody]] | ||
| Line 589: | Line 589: | ||
{| | {| | ||
|valign="top"|[[Image:stl3.jpg|150px]] | |valign="top"|[[Image:stl3.jpg|150px]] | ||
| - | |valign="top" style="width: | + | |valign="top" style="width:180px;"| |
|valign="top" style="width:250px;"|[[Somebody To Love (single) | Somebody To Love]] | |valign="top" style="width:250px;"|[[Somebody To Love (single) | Somebody To Love]] | ||
| Line 610: | Line 610: | ||
{| | {| | ||
|valign="top"|[[Image:ep3.jpg|150px]] | |valign="top"|[[Image:ep3.jpg|150px]] | ||
| - | |valign="top" style="width: | + | |valign="top" style="width:180px;"| |
|valign="top" style="width:250px;"|'''[[Queen's First EP]] | |valign="top" style="width:250px;"|'''[[Queen's First EP]] | ||
| Line 633: | Line 633: | ||
{| | {| | ||
|valign="top"|[[Image:champion3.jpg|150px]] | |valign="top"|[[Image:champion3.jpg|150px]] | ||
| - | |valign="top" style="width: | + | |valign="top" style="width:180px;"| |
|valign="top" style="width:250px;"|'''[[We Are The Champions (single) | We Are The Champions]] | |valign="top" style="width:250px;"|'''[[We Are The Champions (single) | We Are The Champions]] | ||
| Line 654: | Line 654: | ||
{| | {| | ||
|valign="top"|[[Image:crazy3.jpg|150px]] | |valign="top"|[[Image:crazy3.jpg|150px]] | ||
| - | |valign="top" style="width: | + | |valign="top" style="width:180px;"| |
|valign="top" style="width:250px;"|'''[[Crazy Little Thing Called Love (single) | Crazy Little Thing Called Love]] | |valign="top" style="width:250px;"|'''[[Crazy Little Thing Called Love (single) | Crazy Little Thing Called Love]] | ||
| Line 675: | Line 675: | ||
{| | {| | ||
|valign="top"|[[Image:another3.jpg|150px]] | |valign="top"|[[Image:another3.jpg|150px]] | ||
| - | |valign="top" style="width: | + | |valign="top" style="width:180px;"| |
|valign="top" style="width:250px;"|'''[[Another One Bites The Dust (single) | Another One Bites The Dust]] | |valign="top" style="width:250px;"|'''[[Another One Bites The Dust (single) | Another One Bites The Dust]] | ||
| Line 696: | Line 696: | ||
{| | {| | ||
|valign="top"|[[Image:pressure3.jpg|150px]] | |valign="top"|[[Image:pressure3.jpg|150px]] | ||
| - | |valign="top" style="width: | + | |valign="top" style="width:180px;"| |
|valign="top" style="width:250px;"|'''[[Under Pressure (single) | Under Pressure]] (with David Bowie) | |valign="top" style="width:250px;"|'''[[Under Pressure (single) | Under Pressure]] (with David Bowie) | ||
| Line 717: | Line 717: | ||
{| | {| | ||
|valign="top"|[[Image:gaga3.jpg|150px]] | |valign="top"|[[Image:gaga3.jpg|150px]] | ||
| - | |valign="top" style="width: | + | |valign="top" style="width:180px;"| |
|valign="top" style="width:250px;"|'''[[Radio Ga Ga (single) | Radio Ga Ga]] | |valign="top" style="width:250px;"|'''[[Radio Ga Ga (single) | Radio Ga Ga]] | ||
| Line 738: | Line 738: | ||
{| | {| | ||
|valign="top"|[[Image:iwtbf3.jpg|150px]] | |valign="top"|[[Image:iwtbf3.jpg|150px]] | ||
| - | |valign="top" style="width: | + | |valign="top" style="width:180px;"| |
|valign="top" style="width:250px;"|'''[[I Want To Break Free (single) | I Want To Break Free]] | |valign="top" style="width:250px;"|'''[[I Want To Break Free (single) | I Want To Break Free]] | ||
| Line 759: | Line 759: | ||
{| | {| | ||
|valign="top"|[[Image:magic3.jpg|150px]] | |valign="top"|[[Image:magic3.jpg|150px]] | ||
| - | |valign="top" style="width: | + | |valign="top" style="width:180px;"| |
|valign="top" style="width:250px;"|'''[[A Kind Of Magic (single) | A Kind Of Magic]] | |valign="top" style="width:250px;"|'''[[A Kind Of Magic (single) | A Kind Of Magic]] | ||
| Line 783: | Line 783: | ||
{| | {| | ||
|valign="top"|[[Image:watccd.jpg|150px]] | |valign="top"|[[Image:watccd.jpg|150px]] | ||
| - | |valign="top" style="width: | + | |valign="top" style="width:180px;"| |
|valign="top" style="width:250px;"|'''[[We Are The Champions (single) | We Are The Champions]] | |valign="top" style="width:250px;"|'''[[We Are The Champions (single) | We Are The Champions]] | ||
| Line 804: | Line 804: | ||
{| | {| | ||
|valign="top"|[[Image:wwrycd.jpg|150px]] | |valign="top"|[[Image:wwrycd.jpg|150px]] | ||
| - | |valign="top" style="width: | + | |valign="top" style="width:180px;"| |
|valign="top" style="width:250px;"|'''[[We Will Rock You (single) | We Will Rock You]] | |valign="top" style="width:250px;"|'''[[We Will Rock You (single) | We Will Rock You]] | ||
| Line 833: | Line 833: | ||
{| | {| | ||
|valign="top"|[[Image:iwbtlyjpn2jpn.jpg|150px]] | |valign="top"|[[Image:iwbtlyjpn2jpn.jpg|150px]] | ||
| - | |valign="top" style="width: | + | |valign="top" style="width:180px;"|[[Image:iwbtlyjpn2jpnback.jpg|150px]] |
|valign="top" style="width:250px;"|'''[[I Was Born To Love You (Queen single) | I Was Born To Love You]] | |valign="top" style="width:250px;"|'''[[I Was Born To Love You (Queen single) | I Was Born To Love You]] | ||
| Line 850: | Line 850: | ||
{| | {| | ||
|valign="top"|[[Image:dsmnjpn.jpg|150px]] | |valign="top"|[[Image:dsmnjpn.jpg|150px]] | ||
| - | |valign="top" style="width: | + | |valign="top" style="width:180px;"| |
|valign="top" style="width:250px;"|'''[[Don't Stop Me Now (single) | Don't Stop Me Now]] | |valign="top" style="width:250px;"|'''[[Don't Stop Me Now (single) | Don't Stop Me Now]] | ||
| Line 869: | Line 869: | ||
{| | {| | ||
|valign="top"|[[Image:bornjpn1.jpg|150px]] | |valign="top"|[[Image:bornjpn1.jpg|150px]] | ||
| - | |valign="top" style="width: | + | |valign="top" style="width:180px;"|[[Image:bornjpn1back.jpg|150px]] |
|valign="top" style="width:250px;"|'''[[I Was Born To Love You (Queen single) | I Was Born To Love You]] | |valign="top" style="width:250px;"|'''[[I Was Born To Love You (Queen single) | I Was Born To Love You]] | ||
| Line 886: | Line 886: | ||
{| | {| | ||
|valign="top"|[[Image:rockyoujpncd.jpg|150px]] | |valign="top"|[[Image:rockyoujpncd.jpg|150px]] | ||
| - | |valign="top" style="width: | + | |valign="top" style="width:180px;"| |
|valign="top" style="width:250px;"|'''[[We Will Rock You (single) | We Will Rock You]] | |valign="top" style="width:250px;"|'''[[We Will Rock You (single) | We Will Rock You]] | ||
| Line 910: | Line 910: | ||
{| | {| | ||
|valign="top"|[[Image:stlgmcd.jpg|150px]] | |valign="top"|[[Image:stlgmcd.jpg|150px]] | ||
| - | |valign="top" style="width: | + | |valign="top" style="width:180px;"|[[Image:stlgmcdback.jpg|150px]] |
|valign="top" style="width:250px;"|'''[[Five Live EP | Somebody To Love (with George Michael)]] | |valign="top" style="width:250px;"|'''[[Five Live EP | Somebody To Love (with George Michael)]] | ||
| Line 929: | Line 929: | ||
{| | {| | ||
|valign="top"|[[Image:wwtlfcd.jpg|150px]] | |valign="top"|[[Image:wwtlfcd.jpg|150px]] | ||
| - | |valign="top" style="width: | + | |valign="top" style="width:180px;"|[[Image:wwtlfcdback.jpg|150px]] |
|valign="top" style="width:250px;"|'''[[Who Wants To Live Forever (single) | Who Wants To Live Forever]] | |valign="top" style="width:250px;"|'''[[Who Wants To Live Forever (single) | Who Wants To Live Forever]] | ||
| Line 948: | Line 948: | ||
{| | {| | ||
|valign="top"|[[Image:watcfrancecd.jpg|150px]] | |valign="top"|[[Image:watcfrancecd.jpg|150px]] | ||
| - | |valign="top" style="width: | + | |valign="top" style="width:180px;"|[[Image:watcfrancecdback.jpg|150px]] |
|valign="top" style="width:250px;"|'''[[We Are The Champions (single) | We Are The Champions]] | |valign="top" style="width:250px;"|'''[[We Are The Champions (single) | We Are The Champions]] | ||
| Line 971: | Line 971: | ||
{| | {| | ||
|valign="top"|[[Image:dsmncd.jpg|150px]] | |valign="top"|[[Image:dsmncd.jpg|150px]] | ||
| - | |valign="top" style="width: | + | |valign="top" style="width:180px;"|[[Image:dsmncdback.jpg|150px]] |
|valign="top" style="width:250px;"|'''[[Don't Stop Me Now (single) | Don't Stop Me Now]] | |valign="top" style="width:250px;"|'''[[Don't Stop Me Now (single) | Don't Stop Me Now]] | ||
| Line 990: | Line 990: | ||
{| | {| | ||
|valign="top"|[[Image:watcfrancecdcard.jpg|150px]] | |valign="top"|[[Image:watcfrancecdcard.jpg|150px]] | ||
| - | |valign="top" style="width: | + | |valign="top" style="width:180px;"|[[Image:watcfrancecdcardback.jpg|150px]] |
|valign="top" style="width:250px;"|'''[[We Are The Champions (single) | We Are The Champions]] | |valign="top" style="width:250px;"|'''[[We Are The Champions (single) | We Are The Champions]] | ||
| Line 1,010: | Line 1,010: | ||
{| | {| | ||
|valign="top"|[[Image:princescd.jpg|150px]] | |valign="top"|[[Image:princescd.jpg|150px]] | ||
| - | |valign="top" style="width: | + | |valign="top" style="width:180px;"| |
|valign="top" style="width:250px;"|'''[[Princes Of The Universe (single) | Princes Of The Universe]] | |valign="top" style="width:250px;"|'''[[Princes Of The Universe (single) | Princes Of The Universe]] | ||
| Line 1,031: | Line 1,031: | ||
{| | {| | ||
|valign="top"|[[Image:wwrygermancd.jpg|150px]] | |valign="top"|[[Image:wwrygermancd.jpg|150px]] | ||
| - | |valign="top" style="width: | + | |valign="top" style="width:180px;"| |
|valign="top" style="width:250px;"|'''[[We Will Rock You (single) | We Will Rock You]] | |valign="top" style="width:250px;"|'''[[We Will Rock You (single) | We Will Rock You]] | ||
| Line 1,050: | Line 1,050: | ||
{| | {| | ||
|valign="top"|[[Image:wwryfrance2cd.jpg|150px]] | |valign="top"|[[Image:wwryfrance2cd.jpg|150px]] | ||
| - | |valign="top" style="width: | + | |valign="top" style="width:180px;"| |
|valign="top" style="width:250px;"|'''[[We Will Rock You (single) | We Will Rock You]] | |valign="top" style="width:250px;"|'''[[We Will Rock You (single) | We Will Rock You]] | ||
| Line 1,069: | Line 1,069: | ||
{| | {| | ||
|valign="top"|[[Image:wwryfrancecd.jpg|150px]] | |valign="top"|[[Image:wwryfrancecd.jpg|150px]] | ||
| - | |valign="top" style="width: | + | |valign="top" style="width:180px;"| |
|valign="top" style="width:250px;"|'''[[We Will Rock You (single) | We Will Rock You]] | |valign="top" style="width:250px;"|'''[[We Will Rock You (single) | We Will Rock You]] | ||
| Line 1,088: | Line 1,088: | ||
{| | {| | ||
|valign="top"|[[Image:onevisioncd.jpg|150px]] | |valign="top"|[[Image:onevisioncd.jpg|150px]] | ||
| - | |valign="top" style="width: | + | |valign="top" style="width:180px;"| |
|valign="top" style="width:250px;"|'''[[One Vision (single) | One Vision]] | |valign="top" style="width:250px;"|'''[[One Vision (single) | One Vision]] | ||
Revision as of 14:39, 16 August 2007
Contents |
UK CD singles

| 
| I Want It All |
Released: Country: UK Catalog number: Notes: |

| 
| Breakthru
1. Breakthru (extended version) 2. Stealin' |
Released: Country: UK Catalog number: Notes: |

| 
| The Invisible Man |
Released: Country: UK Catalog number: Notes: |

| Scandal |
Released: Country: UK Catalog number: Notes: In the United States, the standard album version was the main track, with My Life Has Been Saved, Hijack My Heart, and Stealin' appearing as the other tracks. |

| The Miracle
1. The Miracle |
Released: Country: UK Catalog number: Notes: Stone Cold Crazy recorded at The Rainbow Theatre, November 1974. My Melancholy Blues recorded at The Summit, Houston, November 1977. Both tracks taken from Rare Live video. |

| 
| Innuendo
1. Innuendo (explosive version) 3. Bijou |
Released: Country: UK Catalog number: Notes: |

| 
| I'm Going Slightly Mad
2. The Hitman |
Released: Country: UK Catalog number: Notes: |

| 
| Headlong
1. Headlong |
Released: Country: UK Catalog number: Notes: In Japan, Mad The Swine appeared as the second track, with Lost Opportunity as the third. In the Netherlands and France, The Hitman appeared as the second track, with Lost Opportunity as the third. |

| 
| The Show Must Go On (CD 1)
3. Queen Talks |
Released: Country: UK Catalog number: Notes: |

| The Show Must Go On (CD 2)
2. Now I'm Here |
Released: Country: UK Catalog number: Notes: |

| 
| Bohemian Rhapsody |
Released: Country: UK Catalog number: Notes: |
| File:Fivelivecd.jpg | File:Fivelivecdback.jpg | Five Live EP
1. Somebody To Love (with George Michael) 2. Killer/Papa Was A Rolling Stone (George Michael only) 3. These Are The Days Of Our Lives (with George Michael and Lisa Stansfield) 4. Calling You (George Michael only) 5. Dear Friends (Queen only) |
Released: Country: UK Catalog number: Notes: Dear Friends released only on the American version |

| 
| Heaven For Everyone Part 1 of 2
1. Heaven For Everyone (single edit) |
Released: Country: UK Catalog number: Notes: |

| 
| Heaven For Everyone Part 2 of 2
1. Heaven For Everyone (single edit) 4. Killer Queen |
Released: Country: UK Catalog number: Notes: |

| 
| A Winter's Tale Part 1 of 2
2. Now I'm Here |
Released: Country: UK Catalog number: Notes: |

| A Winter's Tale Part 2 of 2 |
Released: Country: UK Catalog number: Notes: special green Christmas packaging |

| 
| Too Much Love Will Kill You |
Released: Country: UK Catalog number: Notes: |

| 
| Let Me Live Part 1 of 2
1. Let Me Live 3. Bicycle Race |
Released: Country: UK Catalog number: Notes: |

| 
| Let Me Live Part 2 of 2
1. Let Me Live 2. My Fairy King (BBC Session) |
Released: Country: UK Catalog number: Notes: The sleeve mentioned that the BBC tracks were taken from a forthcoming album called 'Queen At The BBC'. This album was to feature all 6 sessions that Queen recorded for the BBC. It was never released. |

| You Don't Fool Me
1. You Don't Fool Me (Album Version) 2. You Don't Fool Me (Dancing Divaz Club Mix) |
Released: Country: UK Catalog number: Notes: |

| 
| No-One But You (Only The Good Die Young)
1. No One But You (Only The Good Die Young) |
Released: Country: UK Catalog number: Notes: |

| 
| Under Pressure Part 1 of 2
2. Under Pressure (Mike Spencer Mix) 3. Under Pressure (Knebworth Mix) 4. Enhanced Section |
Released: Country: UK Catalog number: Notes: |

| 
| Under Pressure Part 2 of 2 |
Released: Country: UK Catalog number: Notes: |
1988 UK 3" CD singles

| Seven Seas Of Rhye |
Released: Country: UK Catalog number: Notes: |

| Killer Queen
1. Killer Queen |
Released: Country: UK Catalog number: Notes: |

| Bohemian Rhapsody |
Released: Country: UK Catalog number: Notes: |

| Somebody To Love
2. White Man |
Released: Country: UK Catalog number: Notes: |

| Queen's First EP
1. Good Old-Fashioned Lover Boy |
Released: Country: UK Catalog number: Notes: |

| We Are The Champions |
Released: Country: UK Catalog number: Notes: |

| Crazy Little Thing Called Love
1. Crazy Little Thing Called Love 3. Flash |
Released: Country: UK Catalog number: Notes: |

| Another One Bites The Dust |
Released: Country: UK Catalog number: Notes: |

| Under Pressure (with David Bowie)
1. Under Pressure (with David Bowie) 2. Soul Brother |
Released: Country: UK Catalog number: Notes: |

| Radio Ga Ga
1. Radio Ga Ga 2. I Go Crazy |
Released: Country: UK Catalog number: Notes: |

| I Want To Break Free |
Released: Country: UK Catalog number: Notes: |

| A Kind Of Magic
2. A Dozen Red Roses For My Darling 3. One Vision |
Released: Country: UK Catalog number: Notes: |
USA Only CD Singles

| We Are The Champions |
Released: Country: USA Catalog number: Notes: |

| We Will Rock You
1. We Will Rock You (ruined by Rick Rubin) 2. We Will Rock You (ruined instrumental) 3. We Are The Champions (ruined by Rick Rubin) |
Released: Country: USA Catalog number: Notes: |
Japanese Only CD Singles
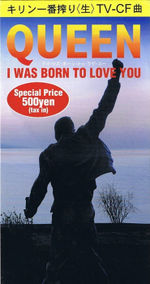
| 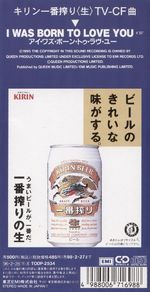
| I Was Born To Love You |
Released: 1996 Country: Japan Catalog number: Notes: 3" CD Single |

| Don't Stop Me Now
2. Let Me Live |
Released: 1996 Country: Japan Catalog number: Notes: 3" CD Single |
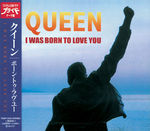
| 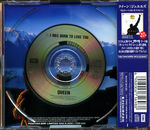
| I Was Born To Love You |
Released: 2004 Country: Japan Catalog number: Notes: 3" CD Single |
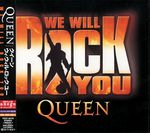
| We Will Rock You
2. Teo Torriatte (Let Us Cling Together) (High Definition Mix 2005) |
Released: 2005 Country: Japan Catalog number: Notes: 3" CD Single |
Misc CD Singles

| 
| Somebody To Love (with George Michael)
1. Somebody To Love (with George Michael) 2. Dear Friends |
Released: Country: Netherlands / France Catalog number: Notes: |

| 
| Who Wants To Live Forever |
Released: Country: Netherlands Catalog number: Notes: |

| 
| We Are The Champions |
Released: Country: France / Netherlands Catalog number: Notes: In the Netherlands, the tracks were reversed so that We Will Rock You appeared before We Are The Champions. Live versions taken from Live At Wembley '86. |

| 
| Don't Stop Me Now |
Released: 1994 Country: France Catalog number: Notes: |

| 
| We Are The Champions |
Released: 1998 Country: France Catalog number: Notes: Cardboard Sleeve |

| Princes Of The Universe
3. Enhanced Section |
Released: 2000 Country: Netherlands Catalog number: Notes: |

| We Will Rock You |
Released: 2003 Country: Germany Catalog number: Notes: |

| We Will Rock You |
Released: 2003 Country: France Catalog number: Notes: |

| We Will Rock You |
Released: 2003 Country: France Catalog number: Notes: |

| One Vision
1. One Vision |
Released: 2005 Country: France Catalog number: Notes: |